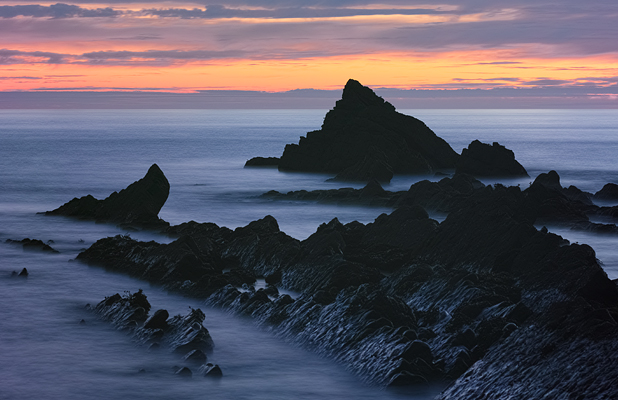
Introduction:
First of all let me start by saying that this is not meant to be an all encompassing review with resolution charts, etc. etc. of the RZ67 lenses (that I own) when used with a DSLR camera. Nor is it meant to be a comparison with any existing DSLR lens. At the time I was looking into acquiring the lenses it was very clear that most, if not all, the reviews of the RZ lenses that could be found on the internet were based on working with film, I thought that having subsequently acquired a few of the lenses, that I would take the time to write an article in the event that anybody else might be interested in exploiting these lenses on a DSLR system.
Some useful links upfront:
Technical data of all the lenses available under the section: Lenses and Accessories
A good summary (for film) of available lenses (including the various lens iterations)
Mamiya Rz67 Wikipedia
The Mamiya RZ67 camera system was extremely popular amongst studio film photographers for many years with both camera and lens going through several generations. As such, although both camera and lens production have been discontinued, there is an extensive 2nd hand market. A simple search of eBay or KEH Camera ( see here ) will give a good indication of the extremely favourable prices with which these lenses can be acquired (though it is important to note whether the lens represents the latest iteration of a particular focal length) . I am extremely happy with the way these lenses have performed to date and my aim is to show how the lenses stand up to the Foveon APC Merrill Sensor in the form of the Sigma SD1M which has the ability to capture very high levels of detail due to the lack of interpolation of the data.
Fotodiox RZ67-DSLR Adaptor:
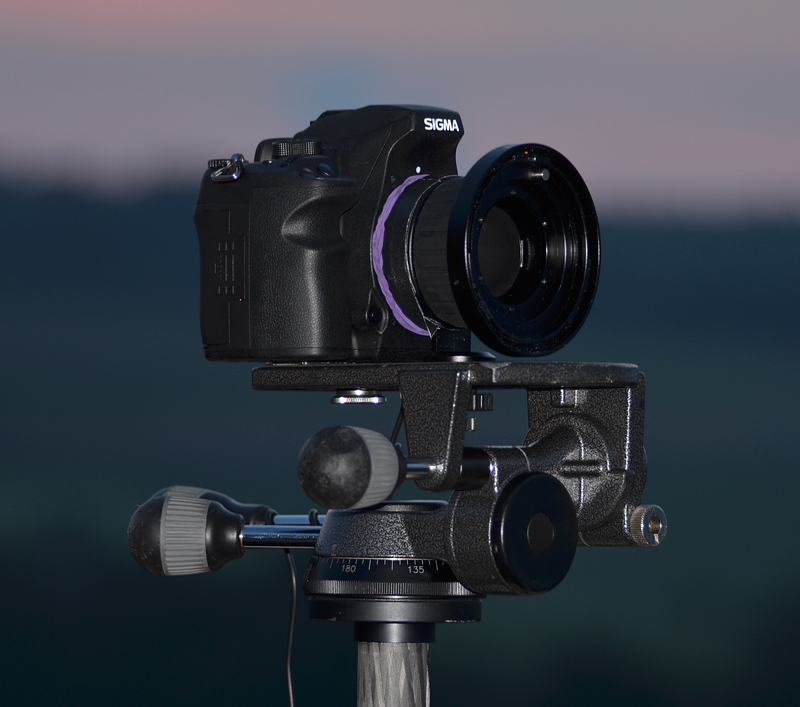
Sigma SD1M with Fotodiox adaptor. The showing metal peg on the adapter which opens the lens shutter ready for use.
The essential piece of equipment which allows the use of these lenses. Several versions of this adaptor are available for Nikon-F, Canon-EF (with ( see here ) and without focus confirmation via a dandelion chip), Pentax-K ( see here ) and Sony Alpha Cameras. Since the Sigma SA Mount is closely related to the Pentax-K mount, it is not surprising, though not so well documented, to find that the Pentax-K bayonet fits reasonably well into a Sigma SA mount. However, since the bayonet is not absolutely identical there is a small amount of residual rotational movement as well as a small amount of lateral movement in the plane of the mount that is possible even after the adaptor is locked in place. The Pentax mount is narrower than the Sigma Bayonet so that, if not centred, it is possible that some light may enter the camera – I have corrected this by adding several layers of insulation tape around the end of the adaptor. Whilst this does not look quite so ‘pretty’ (see image above) it is very effective.
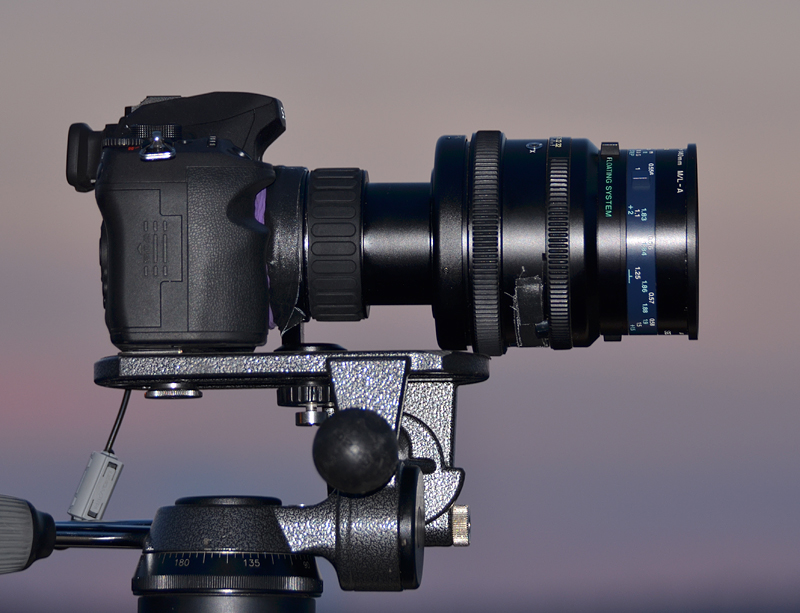
SD1M and adaptor mounted both attached to tripod head with 140mm lens / extended helicoid
(also showing the metal spacer under the camera body)
The registration distance for Pentax lenses is slightly longer than that for Sigma (45,5mm vs 44mm) so that the adaptor can focus ‘beyond’ infinity. Whilst this is on the whole not a problem it does affect the shortest focus distances of each lens which is about double that which it would be on the RZ67 camera (see below). The RZ67 lenses fit into the adaptor (as they do on the RZ67 camera) by mounting in the correct orientation and then locking them into place by twisting a locking ring on the lens (about 30°) rather than by twisting the lens itself, as on a DSLR system. The levers used to set the leaf shutter in the lens slot nicely into appropriate holes in the outer ring of the adaptor which then twists to open (and close for storage) the leaf shutter ready for use with the DSLR. The main body of the adaptor is the helicoid focus ring (there is no focus mechanism in the lens – though see 50mm and 140mm lens descriptions below) which replaces the bellows focus rail of the RZ67 camera system. This moves smoothly if more stiffly than a standard DSLR focus ring. This focus movement displaces the lens up to 46mm from the closed position (beyond infinity) to the point of nearest focus. Since the lenses are, with the exception of the 110mm, not particularly light this firmness is actually somewhat reassuring. There is no communication between lens and camera (except in the case of the one version of the Canon adaptor). The adaptor has a tripod mount which rather cleverly exactly matches the bottom of the lens mounting locking ring meaning that when used on a video tripod head both adaptor foot and locking ring take the weight of the lens providing a stable support. In the case of the Sigma SD1M when the adaptor is locked in place there is actually a couple of degrees twist on the camera, which if rotated slightly by pressing the lens release button sits approximately 1,5mm above the plane of the adaptor foot – a simple piece of plastic or metal can be slotted into this space before attaching the camera to the video head to provide a very robust and secure support for both camera and lens. In order to allow attachment to a ball or quick release head (for example) which has a small area and single point of attachment, I have made a 17cm strip of metal (aluminium) with two holes to secure camera and adaptor foot as well as supporting the locking ring of the lens. This combination provides a very nice level of additional support for hand use (eliminating the residual rotational freedom of the adaptor), though actually not necessary and in the event these are not going to be the first choices of lenses for use without a tripod. Swapping between the lenses is then also very straightforward, since neither adaptor foot or camera need to be released from the tripod.
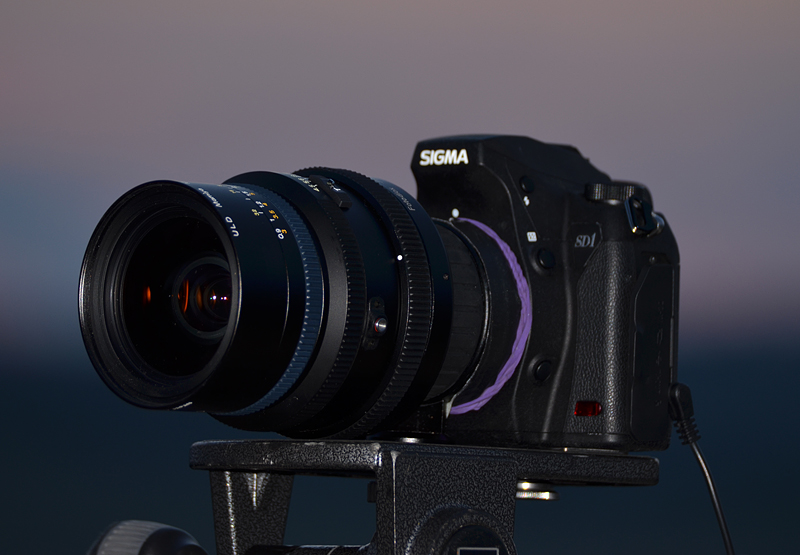
Attached to the RZ67 50mm ULD lens: The blue ring is to focus the floating glass element
General Information RZ67 Lenses:
The lenses are extremely well built and feel very solid (being an all metal construction they are therefore not light). Thus 2nd hand lenses survive very well assuming the glass has not been mistreated. Somewhat initially surprisingly to me, was that, although the RZ67 lenses were designed to work normally with 6x7cm film, the focal length of the lens is exactly equivalent to that of a full frame DSLR sensor. Despite the fact that the image size is very much smaller (meaning that only the very centre of the image circle is being used) the multiplication factor on an APS-Sensor is only 1.5x. Thus for example, the smallest ‘corrected’ lens, the 50mm, is equivalent to 24mm on a RZ67 body, 50mm on a full frame DSLR and 75mm with an APS-Sensor.
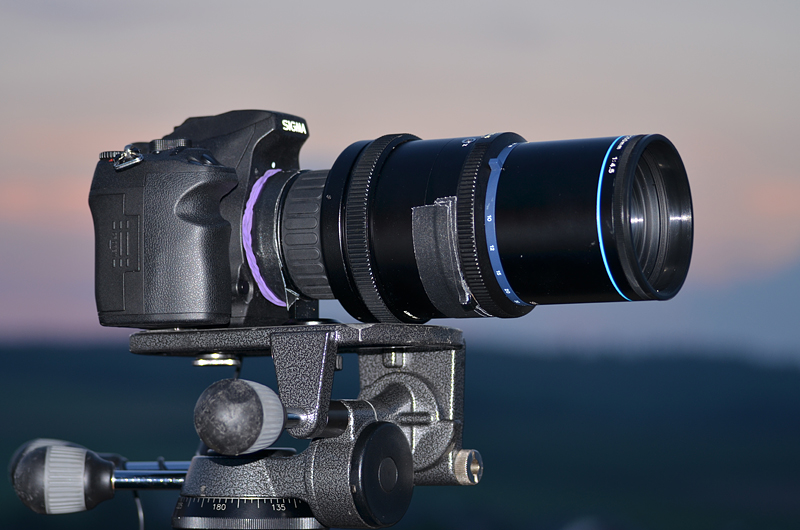
With the RZ67 210mm showing the depth-of-view preview slider permanently taped in the closed position
The lenses do not have a focus mechanism but are brought into focus by moving them in relation to the sensor (film) plane. As such, depending on the lens, the amount of light which reaches the sensor is different depending on whether they are focused at infinity (closest to sensor) or focused on a close object (furthest from sensor). Thus for any particular aperture the shutter speed is also dependent on focus distance. With the 50mm lens the difference is about 0.3 stops where as for the longer lenses this can be up to 1.5 (or more) stops. Of course, when using the camera meter system this is not a problem but it is something to be aware of. As previously mentioned the leaf shutter is opened (ready for focusing and taking pictures using the DSLR shutter) or closed (for storage) using the outer adaptor ring. The aperture in the lens is however normally set and controlled by the RZ67 camera, which is fully open in its ‘resting state’. To use the lens on the adaptor the lightly spring loaded, depth of field preview slider (which closes the aperture to the chosen setting) is either held closed by hand prior to triggering the DSLR shutter or, as I have done, can be permanently held in the depth of field preview mode by placing several layers of tape on the lens on which the slider will then sit. The f-stop settings on the lenses are directly comparable to that of a normal DSLR lens with one proviso: The closing of the aperture ring does not begin to affect the light intensity that hits the sensor until the aperture ring has been closed by at least 1 stop (depending on the lens). Thus for example when wide open the 210mm the F-Stop of f4 is correct, setting the ring to f5,6 has no effect on the amount of light hitting the sensor and the setting of f8 is equivalent to f5,6. Since all the lenses have at least a setting of f32 (the 210mm APO closes to f45) there is still, on the whole, plenty of scope to get depth of field. However, this effect is very pronounced with the 50mm (see below) which has thus the most limitation with respect to depth of field.
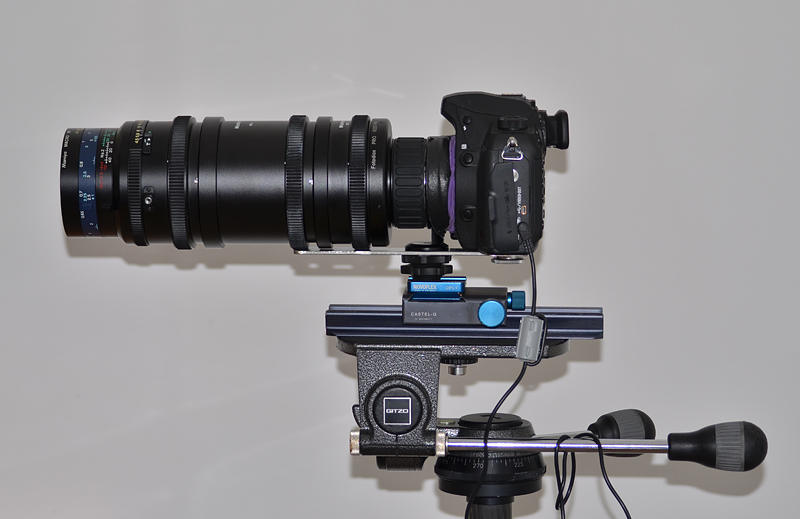
With RZ67 140mm and extension tubes #1 and #2 via a single point of attachment
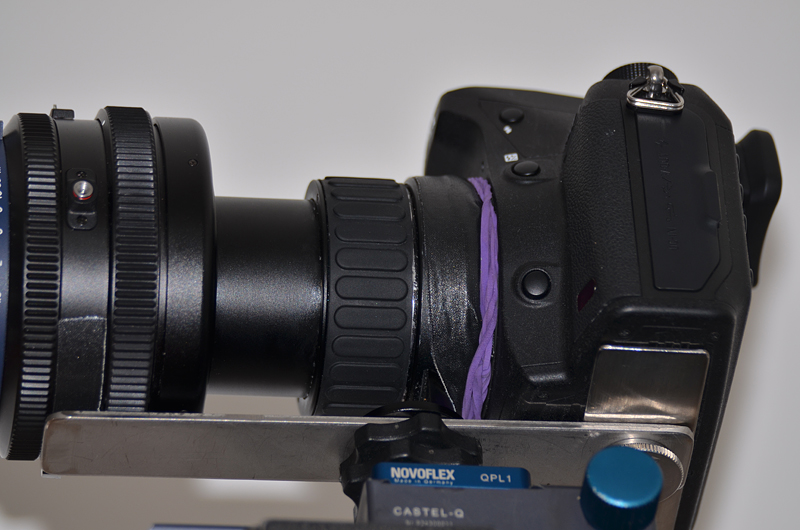
Detail view showing 17cm metal support for lens and spacer for body for single point mounting
I work with the lenses in manual mode on the SD1M to obtain the correct exposure. Having focused wide open (here the Pentax O-ME53 1.2x viewfinder magnifier ( see here for example ) which fits nicely on the SD1M is a good focus aid making it now a permanent fixture on my SD1M) – half pressing the shutter does provide focus confirmation, assuming good light – the lens is then closed to the required aperture and the ‘camera aperture’ is set to the same setting. The shutter speed is then adjusted until the camera just reads “-3 stops” under exposure. Depending on focus distance and lens the shutter speed may need to be reduced up to another stop or more – depending on the resulting exposure the shutter speed is adjusted accordingly. All the lenses are extremely well corrected (even without taking account of their ‘age’) producing extremely clean and smooth bokeh and very little if any chromatic aberration (see lens descriptions). All the lenses have a moving depth of field scale which is its only purpose, there being no effect on the focusing of the the lens. As with most 3rd party lenses on the Sigma SD1M there is some tendency to produce a slight magenta coloration in the corners of the image – this is however very easily corrected ( see my article on corrected colour for 3rd party lenses here ).
Mamiya 50mm F4,5 ULD L:
This is the widest corrected RZ67 lens (a 37mm Fisheye is also available), being a very nice 24mm on the RZ67 body (and this is actually the main reason for aquiring this lens). The ULD version is the last (and supposedly best) version of this lens. As stated previously, none of the RZ67 lenses have a focus system, however the ULD version does appear at first glance to have a focus ring. This actually adjusts a floating glass element in the lens which is meant for 6x7cm film use to be set at the same focus distance as the lens itself, in order to maximise the corner detail or deliberately set at a different focus distance to soften the corners. This is / was most relevant for film use, before the days of digital lens blur filters and especially for the 6x7cm image size, on the SD1M with the considerably smaller image, this floating glass element has no effect on the corners of the image and can be safely ignored. The primary use for this lens (for me) will be for panoramic work (as a direct alternative to the DP3M which I also own). Here using the very centre of a good quality medium format lens means that image quality is extremely uniform across the whole APS-sensor sized image, making the images ideal for stitching. The lens, whilst reproducing good uniform detail, has slightly less contrast than the DP3M (producing also a slightly softer bokeh) and would thus probably be good for portrait work (not my field). To note however, is that the aperture does not begin to affect the light affecting the sensor until it has been closed by at least two stops so that the lens is limited to around f13 on an APS-sensor. It controls CA extremely well and interestingly, even on the normal Fotodiox adaptor with the missing 1.5mm from the full near focus extension, the distance of closest focus is a tiny 9cm and although at these close distances the helicoid works quite well a focus rail gives significantly more fine control over the point of focus.


RZ67 50mm / f16 / 1/100 sec. RZ67 50mm / f16 / 1/160 sec.
Mamiya 110mm F2,8 W:
This is the smallest, lightest and brightest of the RZ67 lenses and is without doubt my favourite lens, having an effective focal length of 165mm. It is not quite as well corrected as the other lenses and harsh contrast conditions are able to trigger some CA. It does however produce a very nice bokeh. Being the brightest of the lenses it is also the easiest to focus on the SD1M. Unlike the 50mm ULD this lens has no floating glass element but rather a simple rotating depth of focus scale. On the Fotodiox adaptor it has a closest focus distance of around 50cm (see also comments on 210mm lens and ‘Adapting the Adaptor’ below) being about double of that which would be possible if the register distance between the Sigma and Pentax-K mount were the same.

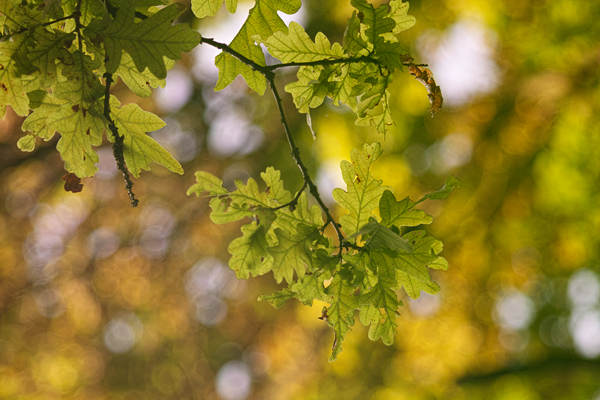
RZ67 110mm / f4,5 / 1/125 sec. RZ67 110mm / f4,5 / 1/100 sec.
Like all the RZ67 lenses the internal leaf shutter can be triggered via a direct cable release at its ’emergency’ default value of 1/400 sec. Having also an X-sync port (as with all the lenses) the leaf shutter could in theory be used at this speed for for flash sync.
Mamiya 140mm F4,5 M/L-A Macro:
This lens appears at first glance to be the most complex of the lenses. Like the 50mm ULD it has a floating glass element which can be adjusted to sharpen or soften the corners when used with 6x7cm film. The scale on this element is unusual for several reasons: Firstly unlike the 50mm ULD lens the scale (running from 0-45) refers not to the focus distance but rather to the number of millimetres by which the focus rail is extended. Secondly, the lens is designed to be used with up to two extension tubes (designated #1 and #2) and there are therefore 3 additional scales for the floating glass element depending on which (or both) extension tubes are being used. As with the 50mm ULD however, due to the small sensor size and crop factor when it is used on the SD1M there is no discernible effect from this floating glass element on the quality of the image. Either alone or combined with the extension tubes this is the go-to lens for close detail work, having a considerably shorter distance of closest focus (around 90cm without extension tubes) than the 210mm APO lens.
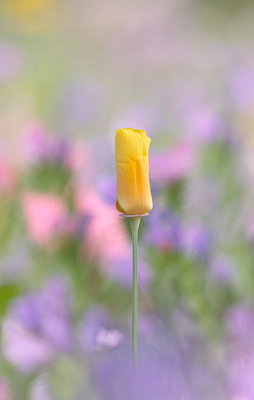

RZ67 140mm / f8 / 1/10 sec. RZ67 140mm / f11 / 0.6 sec. / Tube #1 / Focus stack: 19 Images

RZ67 140mm / f32 / 10 sec. / Tubes #1+#2
Mamiya 210mm F4 APO:
The most well adjusted of the RZ67 lenses from this selection, it produces extremely clean colour and bokeh. It is very sharp and can capture a huge amount of detail even at long distances: The peninsula in the image below (using a Lee ‘Big Stopper’) being some 900m distant – Of course, mirror lock-up is very much a must here! Wide open the depth of field is very narrow with the background being blurred away in a very smooth and pleasing manner. Unfortunately, the closest focus distance at more than 200cm on the standard Fotodiox adaptor is much longer than that of the 140mm macro lens and is effectively double what it should be and can be somewhat limiting. Here the difference in register distance between the Pentax-K and Sigma mounts is key with the ‘missing’ 1,5mm meaning that the 210mm (as with all the lenses here) cannot quite get to its normal nearest focus point before the adaptor has already reached its maximum extension with the helicoid. Whilst in most instances this is not limiting, ultimately, this was main driving force to actually modify the adaptor by adding a metal 1,5mm spacer ring between the bayonet and the main adaptor body (see ‘Adapting the Adaptor’ below). Effectively returning the adaptor to its native 45.5mm Pentax-K registration distance.
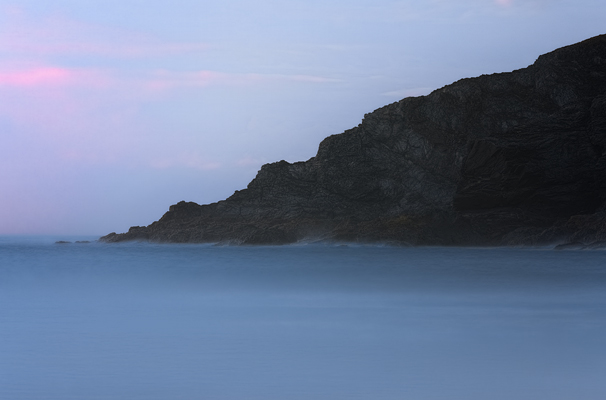
RZ67 210mm / f16 / 10 secs.
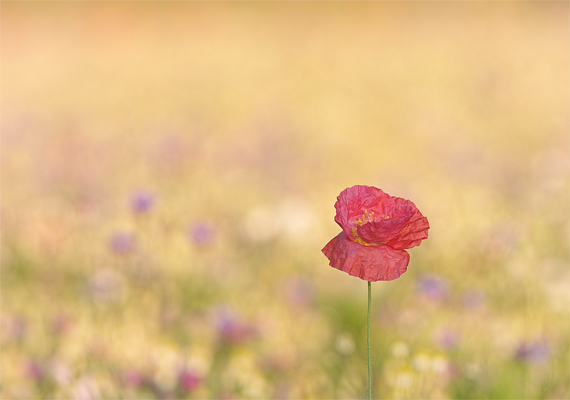

RZ67 210mm / f5,6 / 1/200 sec. RZ67 210mm / f11 / 1/60 sec.
Adapting the Adaptor:
Driven primarly by the desire to achieve the normal shortest point of focus for the lenses I have inserted a 1.5mm metal ring between the bayonet and the adaptor body. This is held in place by 4 screws which can be readily undone. By drilling 4 new holes into the bayonet itself this can be remounted slightly rotated, compenstaing for the rotational difference between the Pentax-K and Sigma mounts, so that when the lens is locked in place the SD1M sits square to the supporting tripod. The orignial screws are however not long enough to be reused and new 2mm x 5mm screws had to be ordered from a speciallist supplier. By making this new separation ring 2mm wider than the bayonet there is now a support for a second 2mm x 2mm ring (the bayonet is 2mm thick) which surrounds the original bayonet effectively negating the size difference between the two mounts. This modification effectively produces a ‘true’ Fotodiox-Sigma SA adaptor – it looks pretty good too!
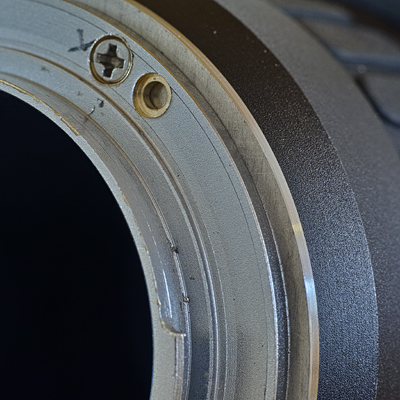
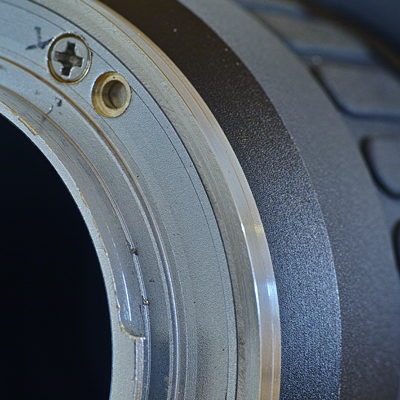
Fotodiox adaptor with additional 1.5mm spacer (with 2mm additional circumference) showing new screw location (with and without aditional 2mm x 2mm sealing ring’).
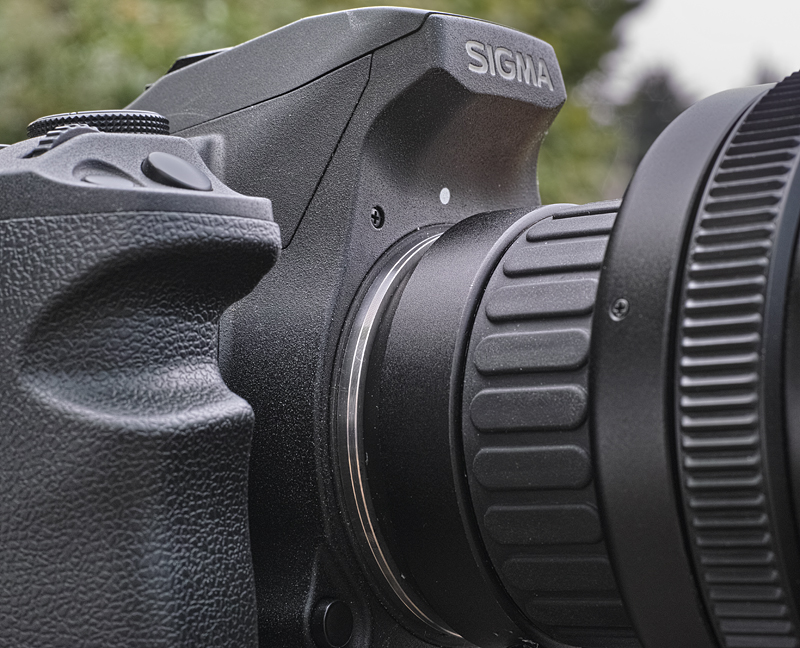
Fotodiox adaptor with additional 1.5mm spacer and sealing ring mounted on the Sigma SD1M.
Notes:
1) All full frame images have undergone colour correction as per the method described in my previous article ( here ).
2) F-stop values for each image refer to the actual value set on the lens (and thus also in camera) and not to the ‘actual’ F-stop values as per sensor crop.
Conclusion:
The RZ lenses work extremely well on the SD1M producing some very nice images. There are some caveats to their use but for me this is worth the effort. Of course, it still begs the question as to ‘why?’ – after all, Sigma themselves produce some excellent lenses at these focus lengths: For example the new 50mm Art or the 105mm Macro and 150mm Macro. One aspect is the character of the images themselves, which, along with the price represents excellent value for money for something a little bit different. Just as important for though me at least, is that owning the lenses, it is but a ‘small step’ (budget allowing) to actually acquiring a RZ67 body (Pro II or earlier models rather than Pro II D since the D version is only required if you want to work with a digital back) with a film back and go back to exploring, amongst other things, the wonderful colours of Fuji Velvia slide film. After all, using the Sigma SD1M is actually rather good training for using a film camera (or visa versa for that matter!):

Sylt: Linhof Technorama 617 SIII 72mm / Fuji Velvia 100F
And to finish, just a few links that might just wet your appetite for the RZ67 Pro II (as they did mine!):
Paul Bowman
Black White Fine Art
Nick Carver
Aryan Aqajani

